Welcome to your go-to guide for understanding drainage costs in NZ. Whether you’re dealing with soggy lawns, water pooling near your foundation, or planning a new build, knowing what to expect can save you time, stress, and money. Drainage isn’t just about pipes, it’s about protecting your home, your land, and your wallet. In this article, we’ll break down the real costs, what influences them, and how to make smart choices that keep your property dry and damage-free.
Drainage costs in NZ typically range from $100 to $500+ per metre, depending on factors like soil type, property layout, drainage system type, and council requirements. A basic residential job might cost around $3,000 to $6,000, while complex or large-scale projects can exceed $10,000.
Table of Contents
Why Drainage Matters More Than You Think
Drainage plays a key role in protecting your home, your land, and even your long-term expenses. In New Zealand, where heavy rainfall and varied terrain are common, poor drainage can quietly cause damage over time. It’s not just about water moving through pipes, it’s about keeping your home dry, stable, and safe.
What Does Drainage Do On A Property
Drainage systems are designed to manage surface and subsurface water. On a basic level, they direct excess rainwater away from your home, lawn, driveway, and foundations. A good drainage system prevents water from pooling on your property, reduces erosion, and protects the structure of your home. It also helps maintain healthy soil, avoid mud build-up, and support landscaping that lasts.
In urban areas, stormwater drainage helps prevent local flooding and keeps water from seeping into unwanted areas like basements, garages, or under slabs. In rural sections, it’s especially important for managing runoff on sloped land or around large sections where water tends to settle.
Common Signs You Need Drainage Work
Many homeowners overlook drainage issues until they cause visible damage. But early warning signs are easy to spot if you know what to look for:
- Puddles forming in the same areas after rain
- Water stains on foundation walls or garage floors
- A damp or musty smell indoors
- Erosion or washed-out areas in the garden
- Moss or algae growing near the base of the house
- Gutters overflowing or water pooling near downpipes
If any of these sound familiar, it’s likely time to get a professional assessment. Drainage issues don’t fix themselves, they typically get worse over time.
Why Ignoring Drainage Leads To Bigger Repair Bills
Delaying drainage repairs often leads to more expensive problems. Water damage is one of the most costly issues homeowners face because it spreads silently and weakens structures. When moisture seeps into a foundation, it can cause cracking, mold growth, and even subsidence. It may also ruin insulation, warp floors, or attract pests.
What starts as a $4,000 drainage fix can quickly turn into a $15,000 foundation repair if ignored. Beyond structural damage, unresolved drainage problems can make your outdoor spaces unusable, reduce property value, and trigger repeated landscaping costs.
In short, proper drainage isn’t just a background task, it’s a smart investment in your property’s future. Ignoring it is almost always more expensive than dealing with it early.

What Affects Drainage Costs In NZ?
When budgeting for drainage work in New Zealand, there’s no one-size-fits-all price. The final cost depends on a mix of physical, logistical, and regulatory factors unique to each property. Understanding what drives these costs can help you plan better and avoid surprises. Here’s what impacts the price of drainage installation or repairs in NZ:
Property Size And Slope
The larger your section, the more drainage coverage you’ll need. A flat backyard might require simple surface drains, while a steep property could demand a more complex system with deeper trenches, retaining methods, or tiered installations. Slopes also affect how water flows, which influences where and how drains need to be placed, impacting time, labour, and materials.
Soil Type And Ground Conditions
Soil composition plays a big role in drainage performance and cost. For example:
- Clay-heavy soils retain water and drain slowly, often requiring extra excavation or more advanced systems.
- Sandy soils drain quickly but may need reinforcement to avoid collapse during digging.
- Rocky ground or hardpan layers can slow down the job and increase equipment use.
Contractors may charge more if they expect to hit tough soil or underground obstructions.
Type Of Drainage System (Surface Vs Subsurface)
Different issues call for different solutions. Surface systems (like channel drains or grates) are often cheaper and easier to install. These handle rain runoff or visible pooling.
Subsurface systems (like French drains, soak pits, or drain coil installations) are buried underground and manage water buildup below the surface. They’re more labour-intensive and often cost more due to deeper digging, filter layers, and piping.
Access To The Site (Machinery Use, Obstructions)
Tight spaces, fences, retaining walls, or landscaped features can limit machinery access. If workers can’t get a digger close to the area, manual labour may be required, which slows down the project and raises the cost. Easy access usually means faster work and lower quotes.
Local Council Requirements Or Consents
In many areas, drainage work requires council notification, inspection, or full building consent. You might also need engineering reports, especially if you’re building on a slope or near a waterway.
These consents aren’t free, expect to pay for:
- Application fees
- Inspection bookings
- Possible rework if something doesn’t meet code
Timelines can also stretch depending on how fast your local council processes paperwork.
Labour And Material Costs Across Different Regions (E.g., Auckland Vs Christchurch)
Where you live matters. Labour rates in Auckland, for example, tend to be higher than in smaller towns. Materials like drain coils, gravel, or concrete may also vary in cost based on regional supply chains and freight costs.
A similar drainage job may be thousands more expensive in one region compared to another, even with the same specs.
- Did you know?
Coastal areas in NZ often face different drainage challenges than inland properties. Higher water tables, sandy soils, and salt exposure can affect both the type of system used and its expected lifespan. Always get local advice before starting drainage work near the coast.

Types Of Drainage Solutions And Their Average Costs
Choosing the right drainage solution depends on your property’s layout, soil conditions, water problems, and plans. Each system has a different purpose and cost, and understanding these differences can help you avoid unnecessary expenses or repairs later. Below, we break down the most common types of drainage systems in New Zealand, when they’re used, and what you can expect to pay.
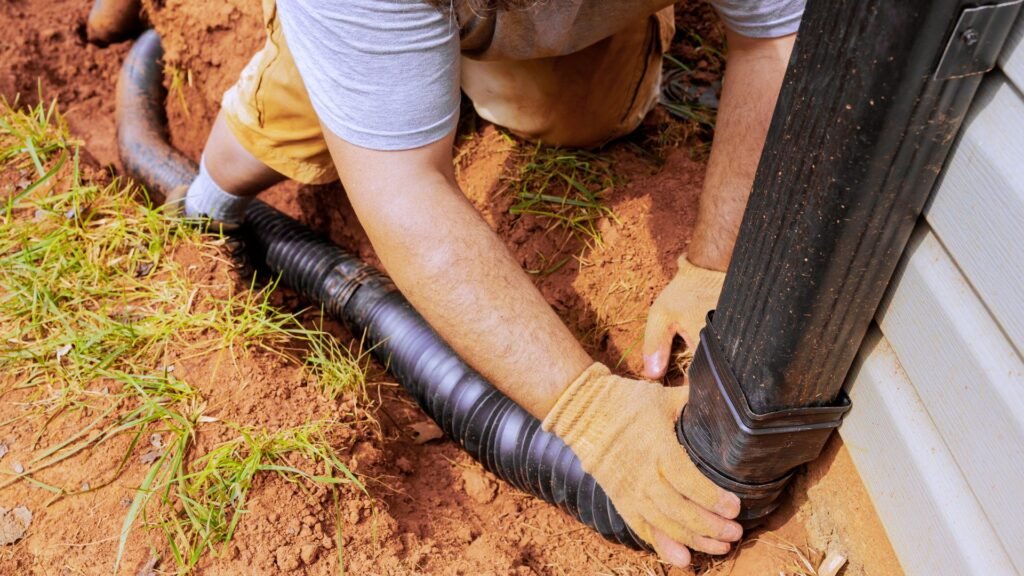
Surface Drainage (e.g., Channel Drains, Stormwater)
Surface drainage systems are designed to remove water that collects above the ground. These include open channels, grates, gutters, and stormwater pipes. You’ll typically see them in driveways, patios, around house perimeters, or near paved areas where runoff needs to be directed away quickly.
- When It’s Needed:
Surface drainage is ideal if you notice water pooling on flat ground, especially after heavy rainfall. It’s also used when rainwater runs toward a structure or collects near doorways and garages. Without proper surface drainage, water can seep into foundations or damage exterior walls. - Cost Range:
The cost for surface drainage systems in NZ usually falls between $100 to $300+ per linear metre. Pricing depends on the type of drain (e.g., plastic vs. concrete channels), the complexity of installation, site access, and any trenching or concrete cutting required. Costs may also rise if connections to the public stormwater system are necessary.
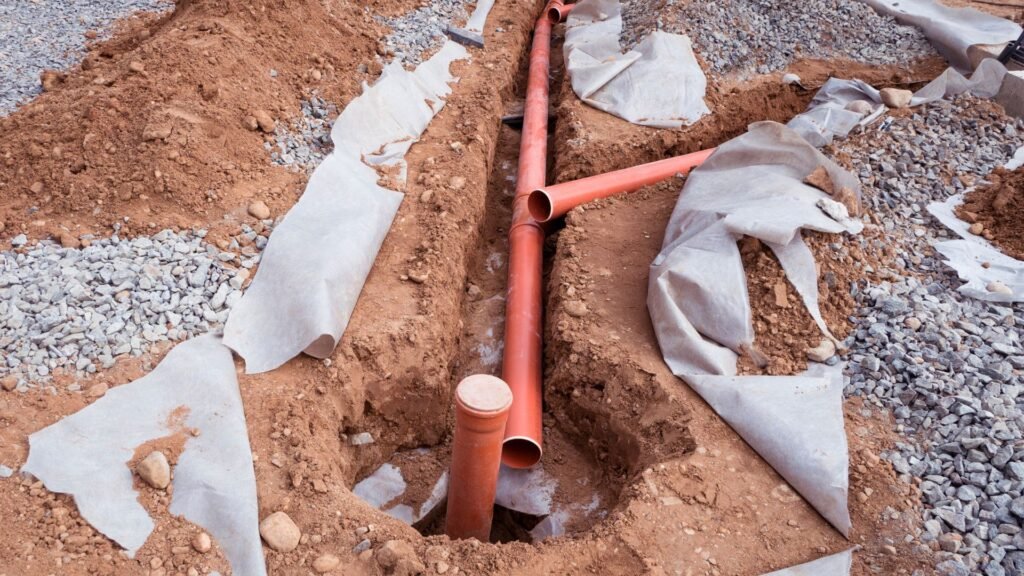
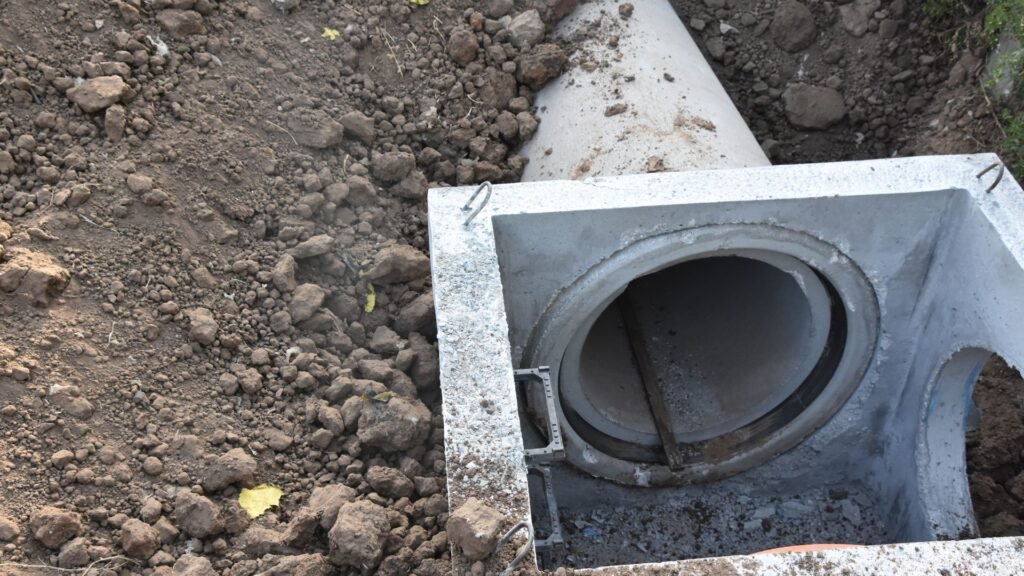
Subsurface Drainage (e.g., French Drains, Soak Pits)
Subsurface drainage is hidden below the ground and handles water that builds up in the soil. It’s used to redirect groundwater away from areas where it causes damage, like retaining walls, foundations, or lawns that never dry out.
- Common In Wet Or Sloped Sections:
If your yard stays muddy for days, you see water oozing up through the ground, or you live on a sloped property, subsurface drainage is often the solution. French drains, for example, are long trenches filled with gravel and a perforated pipe, designed to catch and move water away underground. - Cost Range:
Expect to pay $150 to $500+ per metre for subsurface drainage systems. Costs vary based on the depth and length of the trench, type of materials used, site access, and how much excavation is needed. Installing a soak pit or detention tank adds extra costs, especially if you’re working with clay-heavy or rocky soil.
Retrofitting Vs. New Drainage
There’s a big difference between planning drainage for a new build and retrofitting an existing property. Retrofitting almost always involves more labour, more risk, and higher costs.
- Retrofitting Can Involve Digging Under Existing Structures:
If drains need to go under driveways, patios, or established gardens, expect disruptions. Contractors may need to break through concrete or carefully navigate around tree roots and underground utilities. This adds complexity and time to the project. - Higher Labour Costs And Risk:
Because retrofitting involves careful digging and sometimes partial demolition, it comes with higher labour costs. There’s also more room for unexpected issues, like discovering damaged pipes or poor soil drainage. That’s why retrofit drainage projects often cost significantly more than installing systems during new builds or renovations.
Understanding the type of drainage your property needs and the cost involved helps you plan smarter and avoid paying more than necessary. Whether you’re solving a minor water issue or preparing for a major upgrade, choosing the right drainage solution makes a lasting difference.

Council Rules, Building Consents, And Hidden Fees
Getting drainage work done on your property in New Zealand often involves more than just digging a few trenches. Council rules, building consents, and unexpected fees can add both time and cost to your project. If you’re not prepared, these extra steps can cause frustrating delays and surprise charges. Here’s what you need to know before starting any drainage work.
When You Need Consent For Drainage Work
In many cases, you’ll need council approval before starting drainage installation, especially if you’re connecting to the public stormwater or wastewater system. This applies to both new builds and renovations. Even simple upgrades can trigger consent requirements if they involve altering existing infrastructure or affecting water flow on neighbouring properties.
Always check with your local council before beginning any work. Failing to get the right consents can lead to fines, stop-work notices, and even forced removal of completed systems. In some areas, unapproved drainage work may also impact your home insurance or delay property sales.
Application Fees, Inspections, Delays
Once you apply for building consent, expect to pay application fees that vary depending on your region and project scope. These fees typically cover:
- Plan reviews
- On-site inspections
- Administration costs
After submitting your application, the review process may take several days to weeks. If your plans are incomplete or unclear, the council may request revisions, causing further delays. Once approved, your project will likely require on-site inspections at key stages, especially before backfilling trenches, to ensure the work meets building code standards.
Potential Need For Engineers Or Site Assessments
Not all drainage jobs are simple. If your land is sloped, near a waterway, or has challenging soil conditions, your council may require a professional engineer’s input. This includes detailed site assessments, drainage plans, and hydraulic calculations.
Hiring an engineer typically costs anywhere from $500 to over $2,000, depending on the job. While this adds to the upfront cost, it can help you avoid bigger problems down the line, such as system failure or legal disputes with neighbours.
Extra Costs: Soil Testing, Drainlayers, Permits
Aside from council fees and engineering reports, you may encounter other hidden costs such as:
- Soil testing – Determines ground conditions and permeability, which affect system design
- Licensed drainlayer fees – Only certified professionals can install drainage connected to council services
- Traffic management or access permits – Required if work impacts public roads or footpaths
Some councils also charge development contributions or infrastructure fees for new connections to public drainage systems. Always ask your contractor if these are included in the quote.
By understanding these rules and potential costs, you’ll be better prepared to budget for your drainage project and avoid costly surprises. Always work with professionals who are familiar with local council requirements so your job gets done right the first time.
DIY Vs. Hiring A Drainlayer – What’s Cheaper In The Long Run?
When it comes to drainage work in New Zealand, one of the most common questions homeowners ask is whether they can save money by doing it themselves. While DIY might seem like the cheaper route upfront, drainage isn’t just about digging trenches or laying pipes. It involves legal requirements, technical skills, and long-term consequences that could affect your home and wallet.
Legal Rules: Who’s Allowed To Do What
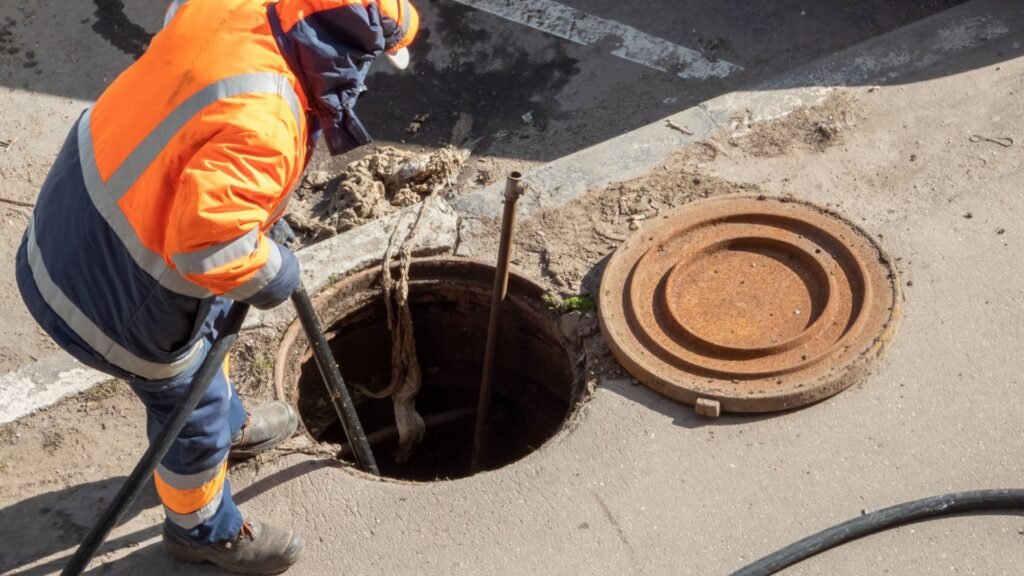
In New Zealand, drainage work is regulated for good reason. Any work that connects to the public stormwater or wastewater system must be carried out by a licensed drainlayer. It’s illegal for unqualified individuals to attempt this type of installation. DIY may be acceptable for minor surface drainage jobs, like adding a small garden drain or channel grate, but as soon as the work involves plumbing, underground systems, or council infrastructure, it’s out of bounds for homeowners.
Failing to follow these rules can result in fines, project delays, or refusal of council sign-off. Worse, non-compliant work might need to be redone by a professional at your expense.
Risks Of DIY (Insurance, Compliance, Poor Performance)
DIY drainage might save money in the short term, but it carries several risks that many homeowners overlook. For one, most home insurance policies won’t cover water damage caused by unlicensed or non-compliant work. If a blocked drain floods your basement or damages your foundation, you could be left with thousands in repair bills and no coverage.
There’s also the risk of doing it wrong. Drainage systems require a deep understanding of slope, water flow, materials, and soil behavior. If the system isn’t installed correctly, water can pool, overflow, or erode your landscape, undoing all your hard work and costing even more to fix.
Long-Term Savings From Professional Installs
Hiring a licensed drainlayer may come with a higher upfront cost, but it often leads to long-term savings. Professionals design systems based on your land’s unique layout, ensuring proper flow and compliance with council regulations. Their work is more reliable, durable, and backed by workmanship guarantees.
A proper installation means fewer future problems, lower maintenance costs, and greater peace of mind. It also protects your home’s value and potential buyers, and inspectors prefer properties with professionally installed drainage systems that come with the right paperwork.
How To Choose A Licensed Drainlayer In NZ
Not all contractors are equal, so it pays to choose carefully. Start by checking that the drainlayer holds a current license under the New Zealand Plumbers, Gasfitters and Drainlayers Board (PGDB). Ask for proof of insurance and recent client references.
Compare at least two to three quotes, and make sure each quote includes details like labour, materials, council fees, and site cleanup. Read reviews, look for clear communication, and avoid vague pricing. A reputable contractor should be upfront about timelines, potential challenges, and whether consents are needed.
You can also ask if they’ve worked on similar properties or dealt with your type of drainage issue before. Local experience often makes a difference, especially if your area has unique soil conditions or council rules.
Choosing between DIY and a professional install shouldn’t just be about upfront costs. It’s about long-term reliability, legal protection, and making the smartest investment for your home. When in doubt, consult a licensed drainlayer; it could save you more than just money.

How To Get An Accurate Drainage Quote
Getting an accurate drainage quote in New Zealand isn’t just about calling the first contractor you find online. It’s about knowing what information to share, what questions to ask, and how to compare your options wisely. The more precise and upfront you are, the more reliable your quote will be, and the fewer financial surprises you’ll face once the job starts.
What Info To Give A Contractor
Start by giving your contractor as much detail as possible. Don’t hold back. Be specific about the problems you’re facing, the location of your property, and the type of solution you’re looking for. Here’s what to include:
- Property address and layout
- Photos or videos of the problem areas
- Any previous drainage work done
- Access points for machinery
- Your expected timeline and budget
- Whether you’re building new or retrofitting
If your property has unique conditions, like heavy clay soil, steep slopes, or underground services, mention those as well. Contractors use this information to estimate labour time, equipment needs, and potential risks. Leaving out details could lead to cost blowouts later.
Why Site Visits Matter
A site visit is one of the most critical parts of getting a realistic drainage quote. Without physically inspecting your land, no contractor can truly assess the scope of the job. Drainage depends heavily on factors you can’t see in photos, like soil condition, subsurface water levels, and elevation changes.
During a site visit, the contractor can:
- Check the terrain and access for machinery
- Identify potential challenges or hazards
- Measure distances for pipe installation
- Spot signs of drainage failure are not visible in images
Always ask if the contractor offers free site visits. Many reputable ones do. If they try to quote over the phone without seeing your property, that’s a red flag.
Questions To Ask (e.g., “Does This Include Consents?”)
Before you approve any quote, get clarity on what’s included. A vague estimate can quickly turn into an expensive project. Use this checklist to guide your conversation:
- Does this quote include council consent fees?
- Are materials, labour, and cleanup covered?
- Will subcontractors be involved, and are they licensed?
- How long will the job take?
- Is weather delay included in the timeline?
- Will you provide a drainage plan or layout drawing?
You want a detailed, itemized quote, not just a flat number. This helps you compare different quotes fairly and gives you something to refer back to if pricing disputes arise later.
Tip: Get At Least 2–3 Quotes For Comparison
Never settle on the first quote you get. Contact at least two or three licensed drainage contractors in your area. When comparing quotes:
- Look beyond price, compare scope, and inclusions
- Check for hidden fees or exclusions
- Ask why one quote is higher or lower than the others
- Read customer reviews or request references
Different contractors may offer different approaches. One might suggest a full French drain installation, while another recommends a simpler surface system. By reviewing multiple options, you can make a better-informed decision that suits your budget and your property needs.
Cost-Saving Tips Without Cutting Corners
Hiring a professional for drainage work doesn’t mean you have to overspend. If you’re planning a drainage project in New Zealand, there are smart ways to manage the cost without sacrificing quality. These practical tips help reduce your expenses while keeping the work compliant and long-lasting.
Combine Drainage With Landscaping Or Renovation Projects
If you’re already planning to landscape your yard, pour a new driveway, or extend your home, it makes sense to coordinate drainage work at the same time. Excavators and contractors are already on-site, which cuts down on separate call-out fees, labor duplication, and equipment transport. For example, if you’re reshaping your garden, that’s the perfect time to install French drains or adjust the slope for surface runoff.
Reuse Soil Or Gravel Where Possible
One of the most overlooked ways to save money is by reusing materials. If your soil is stable and not contaminated, ask your contractor if it can be reused for backfilling. The same goes for gravel; clean, dry gravel pulled from older drains can often be repurposed for base layers or trench backfill. This reduces the need for fresh material and lowers disposal fees.
Time Your Project For Dry Months
Drainage work involves a lot of digging, so the weather plays a big role in how efficient and expensive the job becomes. During dry months, the ground is easier to work with, and there’s less chance of delays due to rain or muddy conditions. Planning your project between late spring and early autumn in most NZ regions can help keep timelines tight and labour costs lower.
Work With Local Contractors To Avoid Travel Surcharges
Many homeowners overlook the travel costs added by contractors coming from outside their region. These can include transport for workers, equipment, and even extra time billed for remote site access. By choosing a qualified contractor from your local area, you avoid those hidden fees and can usually get quicker service. Local pros also know the specific drainage rules in your council zone, which can help avoid compliance issues.
These simple, practical steps won’t compromise the quality of your drainage system. Instead, they’ll help you get more value from your budget and ensure the job is done right the first time. Always ask your contractor if there are savings opportunities based on your site’s condition or your project’s scope.

Real Examples Of Drainage Costs In NZ
Understanding drainage costs in New Zealand becomes much clearer when you see real-life examples. Every property is different, and drainage needs can vary based on location, soil type, and project scope. Below are three typical scenarios that reflect the most common types of drainage jobs across NZ. These examples are based on actual project ranges provided by local contractors and property owners.
Simple Suburban Backyard Fix: $3,000–$6,000
In a standard suburban home, one of the most common issues is poor lawn drainage. Water tends to pool in low-lying areas after rain, creating soggy patches that make lawns unusable and can attract pests. A typical solution involves installing a basic French drain, regrading the section, and adding topsoil for proper runoff.
What’s Included:
- Excavation and installation of a 10–15 metre French drain
- Filter fabric and drainage metal
- Catch basin or sump, if needed
- Minor landscaping restoration
Real Case Example:
A homeowner in Hamilton noticed water sitting near their patio every time it rained. They hired a local drainlayer who installed a 12-metre French drain and connected it to a soak pit at the back of the property. The total cost came to $4,200, including materials, labour, and clean-up. The job was completed in three days, and the yard has remained dry ever since.
Large Rural Block With Multiple Soak Pits: $10,000+
Rural properties usually require more extensive drainage systems due to larger land size and varying terrain. Soak pits are a common solution, especially in areas where stormwater systems aren’t available. These pits help absorb runoff water and reduce pooling around sheds, driveways, or large garden areas.
What’s Included:
- Multiple soak pits were dug and lined with gravel
- Heavy-duty drainage pipes
- Earthworks and trenching equipment
- Labour over multiple days
- Possible engineer input for water flow design
Real Case Example:
A property owner in the Bay of Plenty needed drainage installed on a sloped, clay-heavy section. Water runoff from uphill was flooding a garage and garden shed. A drainage contractor installed three large soak pits and two subsurface drains. The total cost reached $12,500 due to the size of the land and poor soil conditions. The owner now reports zero flooding during heavy rain.
Urban Front Yard Stormwater Upgrade: $5,000–$9,000
In urban areas, council rules often require stormwater to be redirected properly into the street system. This is common when homeowners renovate or add new driveways or patios. A stormwater upgrade might involve connecting to the public system, installing new pipes, and ensuring compliance with council codes.
What’s Included:
- Removal of old surface drains or sumps
- Installation of new PVC stormwater pipes
- Connection to the street or kerb
- Council inspection fees
- Labour and reinstatement of concrete or pavers
Real Case Example:
In Auckland, a homeowner added a new concrete driveway and needed to redirect stormwater runoff. A drainlayer installed new channel drains and connected them to the council stormwater network. The project required permits and a post-install inspection. The total cost was $7,800, including council fees and driveway repairs. The result was a code-compliant, long-term solution.
These examples show how drainage costs in NZ can vary significantly. They also highlight why it’s smart to get a site-specific quote. Each job depends on what your land needs, what rules apply in your area, and how complex the installation will be. If you’re unsure where to start, speaking with a licensed local contractor is the best way to get accurate pricing and long-term peace of mind.
Need reliable drainage solutions in NZ? Get expert advice and accurate quotes from trusted professionals. Visit us to get started.
FAQs: About Drainage Costs In NZ
What is the average cost of drainage work in NZ?
The average cost of drainage work in New Zealand ranges from $100 to $500+ per metre. A simple job may cost around $3,000–$6,000, while more complex or large-scale projects can exceed $10,000 depending on site conditions and requirements.
What factors affect drainage costs in NZ?
Drainage costs depend on several factors: property size, soil type, slope, drainage type (surface or subsurface), site access, local labour rates, and whether council consents are needed.
Do I need council consent for drainage work in NZ?
Yes, in many cases. If you’re connecting to the public stormwater system or altering existing drainage, you’ll likely need council approval and possibly a building consent. Always check with your local authority.
What’s the difference between surface and subsurface drainage?
Surface drainage handles water above ground using grates, channels, and gutters. Subsurface drainage involves underground systems like French drains or soak pits to remove excess groundwater.
Can I install drainage myself in NZ?
Some basic surface drainage can be DIY, but anything involving connections to stormwater or wastewater systems must be done by a licensed drainlayer under NZ law. DIY mistakes can lead to fines, leaks, or insurance issues.
How do I know if my property needs better drainage?
Signs include pooling water, muddy patches, damp basements, moss growth near your foundation, and erosion. A professional assessment can confirm the issue.
How long does drainage installation take?
Most residential drainage jobs take 1 to 5 days, depending on the project size and complexity. Weather delays and council inspections can also affect the timeline.
Can poor drainage lower property value?
Yes. Ongoing drainage issues can lead to structural damage, mold, and landscape deterioration—making your home less appealing to buyers and more expensive to maintain.
Are there ways to reduce drainage costs?
Yes. Plan drainage alongside other landscaping work, use local contractors to avoid travel charges, reuse excavated soil or gravel, and schedule work during dry seasons to avoid weather delays.
How do I choose the right drainage contractor?
Look for licensed and insured drainlayers, check reviews or references, compare 2–3 quotes, and ask if the quote includes consents, materials, and site cleanup. Clear communication is key to avoiding hidden costs.
Conclusion
Investing in proper drainage is more than just a preventative measure, it’s a smart financial decision that protects your property long-term. Acting early can save you thousands by preventing water damage, soil erosion, and costly foundation repairs. When heavy rain hits, you’ll have peace of mind knowing your home is prepared to handle it, without the stress of flooding or water pooling around your foundation. Well-designed drainage also boosts property value, making your home more attractive to future buyers who want a dry, well-maintained section. While drainage costs in NZ can seem high upfront, the long-term benefits far outweigh the initial expense.